- Joined
- Aug 2, 2021
- Messages
- 5
Spatial Warehouse
This article will help you to setup your spatial warehouse project and configure the warehouse task to automate tasks and create history from your objects in your SQL Server database.
Prerequisites:
- Ultimate edition of the desktop product
- Microsoft SQL Server
- SQL Server Management Studio
- GSA Server
Introduction
The SQL Server is not the only database that can be used in combination with Spatial Warehouse. Other options are Oracle and PostgreSQL (with the PostGIS extension), both are supported databases. Configuring these databases is very similar to configuring a SQL Server. The steps that are descripted in the article should suffice to configure one of the other databases.Step 1: Setting up a SQL Server database
Start the SQL Server Management Studio and create a new database for this project.When starting SQL Management Studio, a login prompt appears. When working locally this most likely will be Windows Authentication. Otherwise, specific server credentials are used to log in.
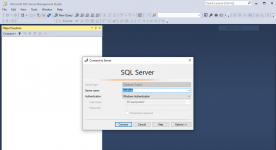
When logged in, right-click on databases and create a new database.
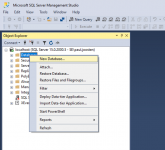
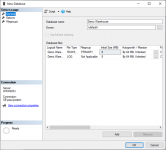
The default settings are fine. Name the database Demo Warehouse and click OK.
Next, right-click on the name of the new database in the menu and select New Query.
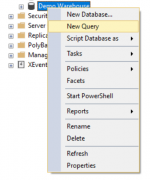
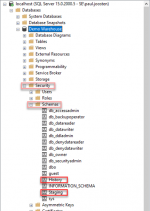
A new window opens on the right-hand side and type in this window create schema History and press F5. After that type create schema Staging and press F5.


Now there will be two schemas added to the database, History and Staging.
Step 2: Setting up the warehouse data source in the project file
Initial setup
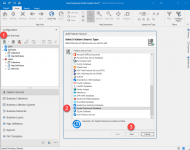
Start GSA Ultimate, open an existing project or create a new one.1. Add a new data source
2. Select Spatial Warehouse Database
3. Click Next
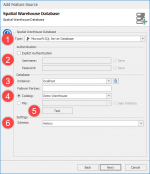
1. Select the database type (in this case SQL Server database)
2. If the box Explicit Authentication is ticked, then enter credentials.
3. Instance is Localhost (if the database runs locally, otherwise enter the server)
4. Catalog, this is the database created in the previous steps
5. Click Test, to verify the connection
6. Click Next
Create MetaModel
When the schema is empty and there is no spatial warehouse MetaModel yet, a pop-up appears. This pop-up poses the questing if a MetaModel may be created. Answer this question with Yes.
For more information please visit these articles:
Add Warehouse Feature Source - GeoSpatial Analysis Warehouse
Create a Warehouse Model - GeoSpatial Analysis Warehouse
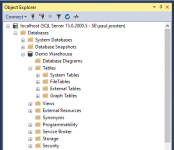
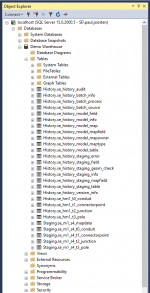
The differences in the SQL Database are easy to see in the images below:
On the left no MetaModel, on the right with MetaModel.
Target
1. Leave the Model empty for the moment, a model will be created in the next step: Configuring the Model.2. Leave the Tablespace/Filegroup box empty.
3. At the staging schema select the staging scheme that is created earlier.
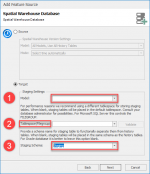
After entering the target setting click Next.
Enter a name for the feature source and click Next.
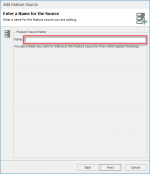
Configuring the model
Click on the warehouse feature source again and select Configure.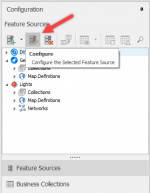
Go to the Management tab, click on Manage… (the button after label Manage Models:)
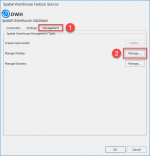
Create a model for the warehouse.
1. Enter the name.
2. EPSG code.
3. History, enable or disable the history.
4. Description according to the data source.
5. Click Create.
6. Click Close to close the management settings.
Managing the batches at this point is useless because there no batches (yet).
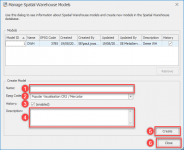
The final configuration step is:
1. Go to the Settings tab
2. Target settings
3. Select the model (that was just created)
4. Click OK
Configuring the business collection
After that, configure the business collection to suit your needs.In this example, we used a shapefile and an excel sheet to create a business collection on municipalities with the population numbers for each municipality. To demonstrate the differences shown when an excel number gets changed in the source data and the warehouse task runs.

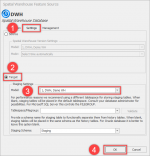
When the business collection is configured, please make sure there is an index on the unique key value.
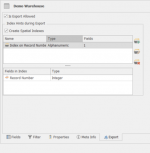
The project file is now finished and configured.
Next the server and warehouse task are set, this is done in the Lite web client and GSA-server.
Step 3: Setting up a GSA-server
For detailed instructions on how to install the GSA-server and Lite web client, please visit the article:https://community.geospatialanalysi...lling-geospatialanalysis-lite-application.95/
Step 4: Configuring the warehouse task in the management client.
When the server is up and running, go to the server management client to configure the warehouse task.The server manager is available on the endpoint address: [computer name]:[port]/Portal.
For this example, the server runs locally, so it will be https://desktop-obnt059:8080/Portal.
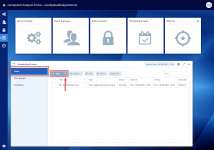
Click on the icon in the left menu or the button Scheduling & tasks to configure the Warehouse task. A new window pops up where task can be configured

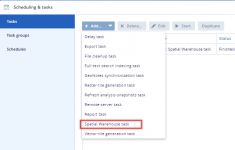
Click Add and click on the small arrow.
Select the Spatial Warehouse task
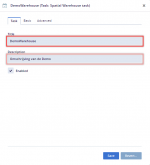
The spatial warehouse task can now be configured, according to the project file.
Task tab:
- Enter a title for the task.
- A description is option but recommended.
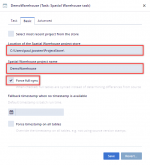
Basic tab:
- Enter the location of the Spatial Warehouse project.
- Enter the name of the project (without the extension .seproject).
- Tick the Force full-sync box if or when this is required. In this example it should be ticked.
Advanced tab:
- No action needed for the initial setup.
The task is now set up according to the project that is created earlier.
Press Start to run the task. In the logging the progress of the task can be followed.
When the task has finished, the results can be inspected in the project file in the batch management setting in the Spatial Workshop.
The state should say Finished if everything has been processed smoothly.
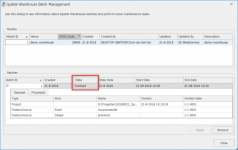
Now the setting up of the warehouse is completed.
Let’s change some source data, for example the population of Amsterdam, in our Excel sheet to look at differences between batches. After changing some population numbers in the Excel Sheet, run the task again.
Now, open a new project file and add the Spatial Warehouse feature source.
Make sure the previously created Model number is selected.
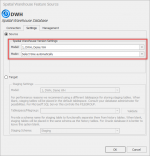
Create the business collection of the source table and
1. Select Collection Differences.
2. The Collection Differences window will show the Collections
3. Click Calculate
4. The number Inserts, Updates and Deletes are shown in the table.
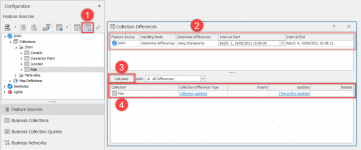
There can be filtered between batches, or time periods, depending on what information is desired.


Clicking on the blue text, the result list will show what changed in the record.
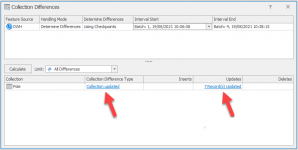
In the red are the results shown of the previous batch, that is now historicized.
In the green are the current values shown in the table. As shown the population of Amsterdam has been updated with a new value!

This business collection can be used to control and analyze differences in the Spatial Warehouse.
Last edited:
