- Joined
- Aug 2, 2021
- Messages
- 5
This article is a step-by-step guide for the basic installation of the GSA Lite application.
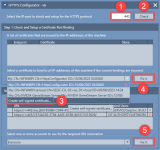
In this article a self-signed certificate is created by using the Spatial Eye HTTPS Configurator application (the application can be downloaded here).


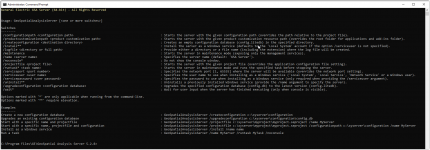
To install the GSA server as a windows service, do the following:


For more information type: GeoSpatialAnalysisServer /h for an overview of all available options.
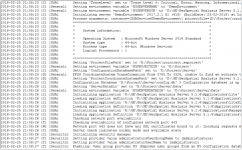
In the log-file information can be found about the server, this file is located here: D:\Program Files\Server\Logs\YourServiceName\*.log.
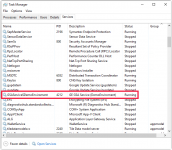
If all the prerequisites are met (licenses, SSL, project file location, OS rights) and the Server can access the data sources that were defined in the project file, the service will be running successfully.
Log in with these credentials:
Example: https://demo.spatial-eye.com/
Prerequisites:
Project created with Professional or Ultimate edition of GeoSpatialAnalysis- Physical or virtual server environment with Windows OS and the desired connectivity
- GSA Server product with valid licenses (GSA server and GSA Lite license files)
- Self-signed or official SSL certificate
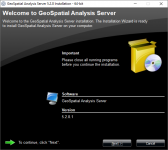
Step 1: Installing the necessary components
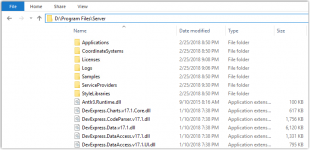
If possible, it is advised to separate the OS applications and the prerequisites for the GSA Lite application (also known as web client) by installing the components on a separate partition (in this example the D:\ drive).
Typical installation locations:
- D:\Program Files\Professional (desktop product)
- D:\Program Files\Server (server product)
- D:\Project\ (project file created with the desktop product)
- D:\Data\ (file-based data sources when applicable)
- D:\Logs\ (directory for the server log files)

Step 2: Installing the SSL certificate
If an official SSL certificate is available, then install it and bind it to port 443 (official https port). See this article for more information about SSL certificates.In this article a self-signed certificate is created by using the Spatial Eye HTTPS Configurator application (the application can be downloaded here).
- Enter the port number
- Click Check
- Select Create self-signed certificate… in the dropdown list
- Click Fix it
- Click Fix it

Step 3: Installing the licenses
To start the Server with the Lite application enabled, the Server and Lite licenses should be placed in the Licenses folder of the Server installation.
Step 4: Setting up a base map
It is possible to set up an external base map for the Lite application. This is done by editing the ServiceProviders.xml in the ServiceProviders folder. You can find an example file in the Sample directory.
Supported Base map providers
- Bing
- Mapbox
- ESRI
- Stamen
- OpenMapTiles
- Openstreetmaps
Step 5: Setting up the location of the project file
Adjust the .exe.config file in the root directory of the GSA Server to set the path to the project file (this should be the full path, like D:\Project\example.seproject).
Step 6: Installing the server as a windows service
With the correct licenses, the GSA server can be installed as a windows service. This is preferred for server environments as it’s easier to maintain long running applications.To install the GSA server as a windows service, do the following:

- Open the command prompt (run as administrator)
- Navigate to the GSA server folder
- Type GeoSpatialAnalysisServer /install /name “[name]” /serviceport [port number]
- Use service port number: 443

For more information type: GeoSpatialAnalysisServer /h for an overview of all available options.

In the log-file information can be found about the server, this file is located here: D:\Program Files\Server\Logs\YourServiceName\*.log.

If all the prerequisites are met (licenses, SSL, project file location, OS rights) and the Server can access the data sources that were defined in the project file, the service will be running successfully.

Step 7: Finishing the configuration with the Server Portal
Start the Server Portal using Edge or similar web browser and address https://yourservername : portnumber/Portal to finish the configuration.Log in with these credentials:
- default username: Administrator
- default password: admin
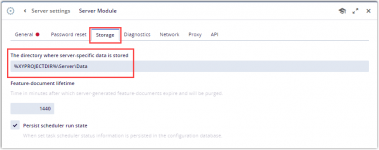
- Click tab Storage
- The directory where server-specific data is stored, should have the value:
- %XYPROJECTDIR%\Server\Data
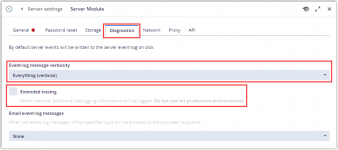
- Click tab Diagnostics
- Event-log message verbosity, select the level of verbosity
- Extended tracing, tick this box for more detailed debugging information
Step 8: Start the GeoSpatialAnalysis Lite application
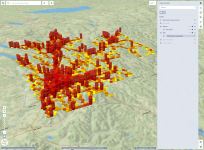
Start the application to view the results.Example: https://demo.spatial-eye.com/

Last edited:

